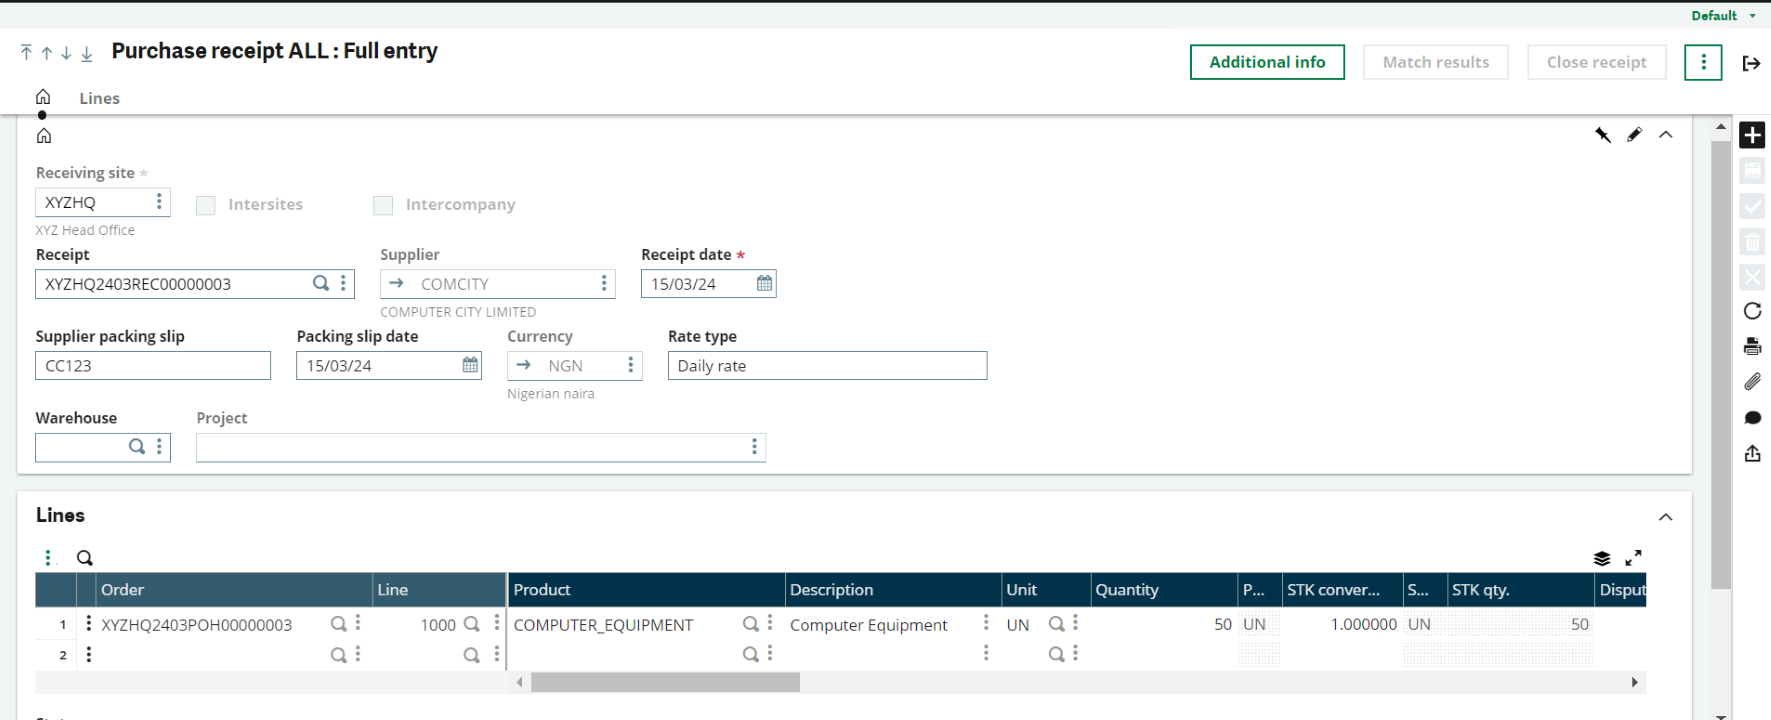
Creating a purchase receipt in Sage X3 is the process of recording the receipt of goods or services from suppliers, these are the following steps:
1. Access the Purchase Receipts Module
- Log in to Sage X3 with your credentials.
- Navigate to the Purchasing module from the main menu.
2. Locate the Purchase Order
- Before creating a purchase receipt, you’ll need to have a purchase order in Sage X3.
- Ensure that the goods or services have been delivered by the supplier and that the purchase order is ready for receipt.
3. Search for the Purchase Order
- In the Purchase Orders section, search for the specific purchase order for which you want to create a receipt.
- You can use filters, search by order number, supplier name, or other criteria to find the relevant order.
4. Generate the Purchase Receipt
- Once you’ve located the purchase order, select it and choose the option to create a receipt.
- This action generates a new purchase receipt based on the details of the purchase order.
5. Enter Receipt Details
- In the purchase receipt screen, enter the receipt details such as the receipt date, received quantities, quality inspection results (if applicable), and any other relevant information.
6. Verify Received Quantities
- Verify that the quantities received match the quantities ordered in the purchase order.
- Make adjustments if there are discrepancies or partial deliveries.
7. Quality Inspection (if applicable)
- If your organisation performs quality inspections on received goods, record the results of the inspection in the purchase receipt.
- This may include passing, failing, or pending inspection statuses.
8. Save and Confirm the Purchase Receipt
- Once you’ve reviewed and confirmed the receipt details, finalize and confirm the purchase receipt.
This action confirms that the goods or services have been received and are ready for processing.

